Wednesday 26 June 2013

Amazing Cleaning Tips for Crafting With Kids

While crafting with your kids should always be an enjoyable experience, it does have a down side. Sometimes the supplies you use to make fabulous crafts can cause quite a mess!
You shouldn't let this stop you from crafting, but you should be aware of it and even plan for it. There are things you can do to your environment and your craft products to make cleaning up easier. There are also some handy tips for dealing with unexpected spills and stains.
Protecting Your Work Surface: One of the best ways to deal with the mess some craft products leave behind is to prepare for it before you start crafting. You can start out by preparing your work surface. The first thing many people will grab for to cover a work surface is newspaper; while this is better than using nothing, craft products can soak through it onto your work surface. What I prefer to use to cover a work surface is wax paper. Not only will it protect your table or counter, the glue from a drying project will not stick to it.
Old, vinyl table clothes or shower curtains also work well for protecting a work surface. These are also nice to lay down on any carpet in the craft area and also to cover furniture. Not only will these protect a variety of surfaces, but they are also very easy to wash with soap or water. They can also be thrown in the washing machine.
Protecting Clothes and Skin: The next thing you will want to protect from craft supplies is your child! A special arts and crafts smock is ideal, but a long sleeve shirt of mom's or dad's works well, especially when worn backwards. You can also use an old t-shirt or apron. You can buys canvas aprons at most craft stores and let your child personalize it.
There are also a few tips you can follow for cleaning hands and any other body parts a little easier:
  1. Keep a container of baby wipes near your craft area. These are handy for quick clean ups!
  2. When painting with acrylic or tempera paints, try adding a squirt or two of dish soap to the paint.
  3. Keep a tub of warm, soapy water and an old dish towel near the craft area so that items that need to be washed to not have to be carried over carpet or other flooring.
Cleaning Your Craft Tools and Supplies: All supplies and tools should be cleaned well after a craft session and put away so they will be ready for the next time you and your child need them. If you keep a tub of water near your work surface, placing paint brushes, sponges, stencils, and other items in there as soon as you and your child are done using them will help to ensure any paint or glue does not start to dry before they are washed. You can then take them to a sink or hose and wash thoroughly with soap and water.
One thing you should keep in mind when it comes to cleaning your tools and supplies, before you wash any craft product down your drain you should read the package and make sure it is safe to do so. There are some products, such as plaster of paris, that can clog your drains and give you other headaches. Make sure you read all the package labels ahead of time so you can be prepared when clean-up time comes around.
Cleaning and Removing Spills and Stains: Even when you are very careful, accidents can happen. You can run to the store and buy spendy cleaners, or here are some household remedies for cleaning and removing the more common craft related spills and stains:
  • Glue: On hard surfaces, try dabbing on a little vegetable oil, peanut butter, or Avon's Skin-So-Soft. Let it sit for several minutes and then rub gently. For fabric, gently scrape or peal off what you can and then try washing with warm sudsy water. If this doesn't work try saturating the spot with vinegar and let it sit for 20 minutes. Try scraping it again and dab it with a rag. Wash again with warm, soapy water.
  • Crayons: On fabric, try spraying a little bit of WD40 (a spray lubricant) onto the spot and dab clean with rag, and then wash the area with liquid dishwashing soap and water. You can also try this on walls and other hard surfaces, or try scrubbing with baking soda mixed with just enough water to make a paste. Rinse and repeat as necessary.
  • Acrylic or Tempera Paint: Paint must be removed while it is wet. Dab, do not rub, the fabric to soak up as much paint as possible. Rinse the area with cold water and wash as usual. Do not dry unless the stain is gone. If the stain persists, lay the fabric on a white rag and dab with rubbing alcohol, the paint stain may be transferred to both rags. Walls and other hard surfaces should simply be washed with warm, soapy water.
  • Ink Pens: From either clothing or walls, try using hair spray. You can also try blotting the area with rubbing alcohol.
  • Markers: The hardest stain to remove! On a hard or fabric surface you can rinse (wipe) with cold, soapy water until no more ink comes out. Try dabbing it with a tip of a rag or cotton balls dipped in rubbing alcohol and rinse with cold water. Treat clothing with a laundry, stain treater and wash. You may do this several time without drying; once your item is put in the dryer the stain will be set forever. For a hard surface you can try scrubbing gently with a liquid cleanser.
Getting Kids to Help With Clean-Up: When it comes down to it, the trickiest part of cleaning up after your crafting adventures might be getting your child to help! Don't give them a choice when it comes to helping, but you can make them feel like they have some control by letting them decide what to do first. Also, it is easier to clean up if everything has a place to go. Decorate coffee cans or plastic containers to hold different supplies. This is a great way to make sure everything is put where it belongs. Finally, if you sing a song together or play some music while you clean up your child is more likely to stay involved and interested.

Tuesday 25 June 2013

9 Creative Gift Wrapping Ideas

It's the thought behind the gift that counts, but when that gift arrives in a beautifully hand wrapped package it's a bit more special. Receiving a fabulously wrapped gift doesn't just build up anticipation for the gift inside, it adds to the gift as a whole.
If you're looking to push your holiday gifts to the next level this year you might want to take a look below!

1. Decorate your wrapping paper using the art of hand stamping. You can create your own stamp with a printmaking block or save some cash and use an eraser.

2. Have you ever thought of sewing your own gift wrap... from pages from an old book? It's simpler than you may think. You can also use wallpaper, old maps or Sunday comics.

3. With the help of your computer and a printer, your gift paper can do all the talking.

4. Scissor out illustrations from old greeting cards and paste to plain stock paper for creative garnishes.

5. If you're an anti-bow person, the woven paper topper may be the right gift wrap idea for you. It's a unique gift topper... and a quick fix to any bad wrapping job!

6. Bright construction paper becomes an offbeat ribbon with the help of a hole punch and some double-sided tape.

7. A gorgeous fresh flower attached with double-sided tape and a satin ribbon adds a feminine touch.

8. Short on paper? Reuse colorful plastic bags. Triple-bag the gift, knot together the handles, then cut the tops of the loops and fan out the pieces.

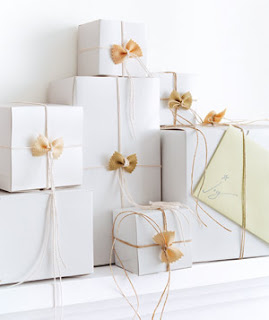
9. Make a plain white paper look more luxurious! Tie a dark-color bow on it or even new kind of bow: bow-tie pasta, cinched with simple string.


Monday 24 June 2013

5 Tips to Avoid a Crafting Catastrophe

We all enjoy crafting.  We craft for many different reasons.  Some of us enjoy wearable arts, paper arts or altered arts.  Today’s crafter enjoys using many different mediums in their crafting which makes mixed-media crafting very popular.
Craft projects can fail for a number of reasons.  Many of those reasons can be avoided.  How you ask?  By following..


1. Plan your Project
Big or small, you want to plan out your craft project before starting your fun.  Think about what you want to create, the materials and tools you will need and the best place to create the project.
There are many different paths you can take to achieve your finished project and you want to think about the best way to achieve your goal.  Gathering all your materials before starting your project will allow you to have everything you need at your fingertips.  This avoids hunting for a missing element, which will disrupt your workflow and lead to projects taking a longer time to complete. 
Crafting projects that are planned have a greater chance of success than those that are not thought through.  Think about all the steps that you need to take to finish your project.  What will you do first?  What will be the second step?  Thinking through all the steps will allow you to find the best way to accomplish your goal. 
During this planning phase, you need to test the techniques and products you want to use in your project.  This will help you determine if you are using the right techniques and that the products you are using will yield the results you are trying to achieve.
If the techniques are new to you, practicing them before you use them in your project will help you increase your skill level.

2. The Right Tools/Products for the Job
Crafting should be fun.  If you are not using the right tools and products for your project, you can become frustrated and the project may not turn out like it should.  We have all tried cutting paper with a dull craft knife and we know how much “fun” that can be. Using the right tools can make the project easier.  If you want to avoid a craftastrophe, using the right tools is a must. 
Using the right product is equally important as using the right tools.  Read all the information you can about the products you use.  Visit the manufacturer’s website and the check out the best product for your needs.  For example, regular craft glue can turn yellow with age.  Use that glue with fabric or in an important collage, and the glue will yellow with age.  The project will be ruined.  If your project is something that will be temporary, you may not worry about the aging of the finished project.  But, if you want your artwork to last, knowing the characteristics of the products you use is important.

3. Use Quality Products
Sometimes, spending a lot for a product does not mean that it is a quality product.  A quality product does what it says it does and beyond.  Using a quality product also makes crafting easier and there is a less chance of something going wrong. 
Inexpensive clear craft glues can turn yellow over time, but so can more expensive ones.  Inexpensive cardstock can be flimsy and take away from the look of your project.  How do you find out about the quality of a product?  Research.  Google is a great place to start when you want to find out information about a product.  See what others are saying about a project.
Keep in mind that some rubber-stamping inks fade and there are others that keep their colors over time.  It is true for all inks and some paints.  Asking other crafters and reviewing Internet posts will help you find quality products you will love to use.

4. Keep it Clean
Avoid having food and drinks around your crafting space.  Accidents can happen and accidents can lead to cross contamination of the foods and liquid.  There is nothing worse than having your project almost completed and spilling (insert your favorite liquid here) all over it. 
Are you the type of crafter who gets your inked fingers all over your work?  Do you get glue over everything?  One of my favorite tips to keep it clean is to have a damp cloth next to you as you work.  That way, you can keep your fingers and hand clean as you work.  If your fingers are clean, your project can be kept clean as well. 

5. Follow Instructions
For those of you who are recreating a project or technique from a craft magazine, blog or other source, keep in mind that manufacturers and craft designers take great pains to write project instructions to help you create a great project.  They thought about the project design and the materials they used so you will have an easier and more enjoyable time crafting.  They picked the materials and tools listed in the project because they were the best materials and tools to use for that design.

Craftastophes can happen to the best of us, but with a little thought and planning, you have a better chance to create a project of which you can be proud!

Friday 21 June 2013

MISI Wedding Gift Guide!

Heading to a few weddings this summer and not sure what to gift the happy couple?
While sticking to the registry is always a safe bet, sometimes a handmade and unique gift makes a much more personal statement. After all, now's the time to spoil those that are special to you and wish them a lifetime of happiness together.
From personalized cushion to monogrammed clock, wedding gifts should delight and welcome the newlyweds into their exciting new stage of life!
Check out our Wedding Gift Guide under $70!


See more Wedding Gifts..


Wednesday 19 June 2013

Summer Style - MISI Handmade Gift Guide

Summer is upon us. And, since there are no major holidays coming up that involve gift exchange — the best excuse we have to buy new stuff, is to help make the heat less annoying.
Luckily, there are a few items over at MISI to help make the summer more tolerable, and will add some flair to your next backyard BBQ. Check them out, and be cool.


See more Summer Style Gifts!

Monday 17 June 2013

Apricot Jam Recipe

A delicious Apricot Jam Recipe made with fresh apricots to bring summer sunshine to the table year-round. 

Prep Time: 45 minutes 

Cook Time: 1 hour, 00 minutes 

Ingredients:

  • 2¼lbs/1 kilo fresh apricots, halved and stoned - keep the stones
  • 2¼/1 kilo sugar
  • 1 pint/ 500ml water

Preparation:

  • Cut the apricots in half and remove the stone.
  • Break a number of the stones, remove the almond, wash, dry, and keep to one side. You will need roughly 8 for each pound/450g of jam.
  • Place the sugar in a jam pan with the water and heat slowly to a gentle boil.
  • Drop the fruit into the syrup, bring to a fast boil then immediately remove the fruit and keep to one side.
  • Boil the syrup a second time as in stage 2.
  • Replace the fruit into the syrup and bring back to the boil. Cook for 15 mins.
  • Remove the fruit again, this time place into clean, warm jam jars. Add 2 almonds to each jar; the almonds add extra flavor to the jam.
  • Boil the syrup a third time then pour over the apricots in the jars. Cover with a tight fitting lid and allow to cool. The jam can be stored unopened for several months in a cool place. Once opened store in the refrigerator.
Good Luck! 

Friday 14 June 2013

How to Photograph Clothing For Your MISI Shop

Taking good quality pictures of clothing can be tricky.  The battle to eliminate or control harsh shadows can seem endless, and soft, even lighting can be a real problem. Figuring out how best to display the clothing so it appears appealing to shoppers is also a challenge. 

Here are a variety of tips to display your clothing for great results ranging from the most basic folded display to the most professional fashion model.

1. Know your histogram

First, make sure the camera is exposing the image correctly when you take the picture. To do that, learn how to read the histogram. Every image your camera produces has one. The histogram reviews are usually off by default. The information is there, just not being displayed on the LCD monitor when you review the photo.
Refer to your user’s manual to turn it on so you can see it after each shot. What you are aiming for is an even graph across the whole spectrum, from right to left. I know that’s a little more technical than you asked for, but histograms are easy to read once you get the hang of it. They can make a big difference in how the end photo looks.
2. Minimize shadows
Shadows could be causing the waving effect you refer to. To cure that, you need to remove or move the shadows. That is done by adjusting the lighting. What you need to do is to create soft, diffused light. Think of how a cloudy day softens or eliminates the shadows. That’s what you need to do in your studio—you need to create a cloudy day.
The first step is to turn off the flash on your camera.

3. Soften your approach

Once you turn off the flash, you may need to add more light to expose the image correctly. Professionals use “soft boxes.” These are lights on stands that are covered in a very thin white nylon material. Light coming through the translucent material is softened (like light through clouds) and when it falls on the clothes, it minimizes the shadows.
Once you have good, diffused light, you can streamline your photographing operation and control the waving effect. Be sure to check the angle of the shadow while you are setting up—does it look pleasing to your eye? If it’s not looking good as you look through the LCD screen, the camera will exaggerate whatever is out of place! Take a second to move the lights if it might bring out the color better, or remove the shadow next to the raised material.
Always be looking!

4. Edit to bring out the best

Finally, as you know, photo editing software is your friend. Picasa’s “I’m feeling lucky” tool does a great job on most items. In other software programs, what this tool does is referred to as automatic adjustment, found under the editing menu.
I know the goal is to get those photos done as quickly as possible so you can move to the next phase—selling online. But please don’t forget there is a whole suite of tools in Picasa and other photo editing software designed to help bring out the best. Check out some of the other tabs, too.


Thursday 13 June 2013

10 Tips to Write Great Handmade Jewelry Descriptions

Your handmade jewelry descriptions have to persuade someone that your jewelry is worth buying... And just making a list of materials just doesn't go very far. That's why spending time to hone your description is so important to your ultimate longterm success.
Here are some tips for making those product descriptions more likely to make the sale.
Tip #1: Think of the Title as a Headline
A great description has to first catch your readers attention. Make sure the title of your product is something that catches the eye and makes someone want to read further. You'll want your title to be both descriptive and representative, and not vague and "artsy". Remember, your title won't always be seen with the photo of your work. In search engine listing for example, the title and brief description is all the reader will see. Artsy titles will appeal to the reader more when they actually see the item on your product page.
Here are some examples
  • "The Perfect Mother's Day Bracelet" is a much better title than "Crystal Bracelet".
  • "A Summer Bracelet for Lazy Casual Evenings Out" is better than "Summer Shades".

Tip #2: Benefits are More Important Than Features
Focus your description on benefits (what's in it for me?) first before the features.
A quick overview of features vs. benefits. 
What's a feature? A feature is a descriptor.
Here are some examples:
* Handmade, one of a kind piece
* Sterling silver components
* 16" long.
What's a benefit? The benefit is what that feature does for your customer.
To know what benefit to emphasize, you'll need to know your customer. What are they like? What is important to them? Are they looking for a feeling or experience? Do they need admiration and status? Or are they more concerned with getting something that doesn't break easily?
Here are some examples of benefits:
  • One of a kind There is non other like it in the world (Feeling unique is an emotional benefit that's important to lots of people)
  • Sterling silver Real silver is a luxury and we all need to be pampered sometimes, don't we? (Feeling pampered is sought after by many)
  • 16" long the perfect length for showing off a V-neck and to highlight the face. (Feeling attractive is a strong emotional desire that could be a benefit of your jewelry item.)
  • Strong Chain Links Durable and long lasting, and won't break when a baby pulls on it (Logical benefit)

Tip #3: Include Emotional Benefits and Logical Benefits
People buy for emotional needs, but rationalize with logical benefits so it's a good idea to hit on both. A good rule of thumb is to include 3 emotional benefits and 2 logical ones.
Examples of emotional needs:
  • Feeling loved
  • Feeling attractive
  • Feeling caring or nurturing
  • Feeling altruistic (this is a good one if a portion of your sale goes to charity)
  • Feeling spiritual
  • Feeling intelligent
  • Feeling unique

Examples of logical benefits:
  • Solves a problem (for example if it's a great gift solution for Mother's Day)
  • Money saving (like free shipping or a coupon savings)

Tip #4: Write Conversationally.
Throw out whatever you learned in school. No one wants to read formal, stilted descriptions full of self-important big words. Don't write a dissertation, and you're not making a legal argument either. Write like you speak, and you are much more likely to engage your reader.
Tip #5: Speak Directly to Your Reader
Here's a trick: Pretend you are talking to your best friend. One person only. If it sounds like you're having a chat with a friend, you'll build trust and likability, which ultimately is what will tips the scales for making your sale.
Tip #6: Use "You" instead of "I"
The sweetest word to a reader (other than the person's own name!) is the word "You".
So instead of talk about yourself and what you like about your product, talk about what the product will do for them.
For example...
"You'll feel like the Belle of the Ball on your wedding day"
is infinitely better than
"I created this necklace to suit the bride who wants to be the Belle of the Ball on her wedding day".
Tip #7: Stories are a Jewelry Seller's Best Friend
People often buy handmade jewelry so they can feel wise or insightful and you, believe it or not, YOU are often the biggest selling point especially is your work is very distinctive and unique, or if you yourself are distinctive and unique.
Depending on your market, you'll want to make decisions about what types of stories to tell.
Here are some jewelry story ideas:
  • How you came to be inspired for a piece
  • What funny thing happened that made you think to make this handmade necklace
  • The story behind an interesting found component
  • How one coincidence became a necklace.

Tip #8 Offer a Guarantee
You should always offer some kind of guarantee to increase your customer's comfort level and trust. The guarantee is up to you, but the sales increase is significant for people who offer guarantees, and you might be surprised to know that refund requests are about the same (or even less!) for those that are up front with their guarantee so it only makes sense to offer one.
Tip #9 Tell Your Reader What to Do Next
People are indecisive creatures. It's been proven time and again in sales tests that telling people to buy increases the likelihood that they will. That's why you often see "buy now" or "add to cart" on buttons. So be sure you tell people what to do next at the end of your description. This might be simple as saying click the "add to cart" button to place your order now.
Tip #10 Make it Easy to Buy
Finally, don't make your prospect jump through hoops. The less complicated it is to place an order the better. Try to make it as easy as possible with one click order buttons, and don't ask people for more information than you need. The easier it is to buy, the more sales you'll see.
Do you have any handmade jewelry description tips or a comment? Share yours by adding a comment at the bottom of this article.

Wednesday 12 June 2013

MISI Father's Day Gift Guide

Father’s Day is fast approaching and it’s time to honor Dad for all the gray hairs you’ve given him over the years. Check out our gift guide, full of options that will make Dad feel like a King!